Openstack (2) : 在ubuntu 16.04上安裝Devstack (all-in-one with VMware Workstation)
使用環境:ubuntu 16.04 LTS (一開始使用ubuntu-16.04.5-desktop-amd64安裝有點問題,後來改用ubuntu-16.04.6-desktop-amd64才安裝成功)
使用的Devstack版本:Ocata (更新:Queens也安裝成功)
配置資源(如下圖):4G RAM、4 processors、50GB disk space (後來因為跑不太動,所以將RAM增加到8G、processors增加到8個)
(網路上有些文章提到,Virtualize Intel VT-x/EPT or AMD-V/RVI這個要勾選,會影響後續效能)

P.S. 有時候會出現無法解決的error,可以嘗試利用log中的訊息去修復,如果還是不能,可以重新創一個VM再裝一次(或是在VM創建之初先Snapshot)


參考資料:
利用Screen重启DevStack服务
解决Screen出现Cannot open your terminal ‘/dev/pts/0’问题


RC file載下來後輸入下列指令,並key上openstack的密碼(看你是下載哪個project):

以下提供我的local.conf檔
使用的Devstack版本:Ocata (更新:Queens也安裝成功)
配置資源(如下圖):4G RAM、4 processors、50GB disk space (後來因為跑不太動,所以將RAM增加到8G、processors增加到8個)
(網路上有些文章提到,Virtualize Intel VT-x/EPT or AMD-V/RVI這個要勾選,會影響後續效能)

P.S. 有時候會出現無法解決的error,可以嘗試利用log中的訊息去修復,如果還是不能,可以重新創一個VM再裝一次(或是在VM創建之初先Snapshot)
STEP 1. 軟體更新/升級
sudo apt-get update
sudo apt-get upgrade
STEP 2. 安裝相關的套件
sudo apt-get install vim git python-pip -y
sudo pip install --upgrade pip
sudo pip install -U os-testr
STEP 3. 創建stack用戶
#有些網站會使用sudo tools/create-stack-user.sh(git clone下來的openstack source code內建script)來創建users,這在某些環境下好像會有問題
sudo groupadd stack
sudo useradd -g stack -s /bin/bash -d /opt/stack -m stack

#以root權限更改/etc/sudoers,給stack用戶添加權限(不用密碼),這樣等等安裝openstack的時候就不會一直詢問密碼
sudo vim /etc/sudoers

#在文件中插入這一行
stack ALL=(ALL) NOPASSWD:ALL

#或直接打這行
echo "stack ALL=(ALL) NOPASSWD: ALL" >> /etc/sudoers
STEP 4. 進入stack用戶(接下來的操作都在這個用戶底下進行)
sudo su - stack
STEP 5. 用git下載Devstack原始碼(本篇使用Ocata版本)
git clone https://git.openstack.org/openstack-dev/devstack -b stable/ocata
STEP 6. 進入devstack資料夾
cd devstack
STEP 7. 給予stack安裝目的目錄權限
chown -R stack:stack /opt/stack/devstack
STEP 8. 設定static IP
sudo vim /etc/network/interfaces

#新增static IP,加入下面資訊,網段跟gateway參考VMware的NAT設定(Edit->Virtual Network Editor->VMnet8)
#本篇的網路配置是使用NAT,設定如下圖所示
auto ens33
iface ens33 inet static
address 192.168.119.133
netmask 255.255.255.0
gateway 192.168.119.2
dns-nameservers 8.8.8.8 8.8.4.4

#重開機
sudo reboot

STEP 9. 新增local.conf設定檔(安裝中會讀取)
cp samples/local.conf .

vim local.conf

#根據測試,這段不加也不會影響安裝
#在[[local|localrc]]後面新增下面的內容
GIT_BASE=http://git.trystack.cn
NOVNC_REPO=http://git.trystack.cn/kanaka/noVNC.git
SPICE_REPO=http://git.trystack.cn/git/spice/spice-html5.git

#設定一個自己的密碼
ADMIN_PASSWORD=自己設定一個密碼
DATABASE_PASSWORD=$ADMIN_PASSWORD
RABBIT_PASSWORD=$ADMIN_PASSWORD
SERVICE_PASSWORD=$ADMIN_PASSWORD

#設定Host IP,可以用ifconfig確認一下自己的IP,再把他填上去(我的VM配置是NAT,所以就填上DHCP分配的IP),之後登入Dashboard都是用這個IP
HOST_IP=192.168.X.X


#如果要安裝Heat,可再加入下面內容

#Enable heat services
enable_service h-eng h-api h-api-cfn h-api-cw

#Enable heat plugin
enable_plugin heat https://git.openstack.org/openstack/heat stable/queens

#Use Heat Dashboard in DevStack
enable_plugin heat-dashboard https://git.openstack.org/openstack/heat-dashboard stable/queens
STEP 10. 安裝Devstack (這個部分要跑蠻久的,時間長短根據電腦的效能而訂)
./stack.sh
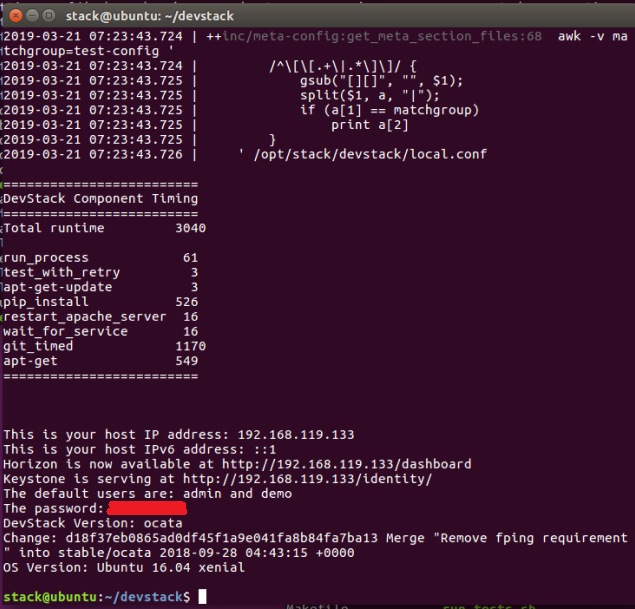
完成後會看到這樣的結果

可以透過瀏覽器來登入Dashboard
#在瀏覽器輸入
http://192.168.X.X/dashboard

PS 1. 如果安裝失敗也可以嘗試移除Devstack,再重新安裝
#解除安裝Devstack
./unstack.sh
# clean.sh會回復到剛從git抓下的檔案狀態,清除/回復剛剛執行stack.sh所創建/修改過的檔案/資料夾
./clean.sh

#重新安裝一次
./stack.sh
PS 2. 在安裝Ocata版本openstack時會有一個bug,每次系統reboot後,所有openstack的服務都會被關掉(Queens版本會自動開啟),可使用下列指令重啟
#更舊的版本有一個rejoin-stack.sh的script
/etc/init.d/mysql start
service rabbitmq-server restart
screen -c stack-screenrc

#啟用screen時如果出現錯誤“Cannot open your terminal ‘/dev/pts/0’ – please check.” ,可執行下列指令
script /dev/null
參考資料:
利用Screen重启DevStack服务
解决Screen出现Cannot open your terminal ‘/dev/pts/0’问题
STEP 11. 下載Openstack RC file
如果沒下載RC file,使用cli操作openstack時會出現下面的錯誤stack@ubuntu:~$ openstack compute service list Missing value auth-url required for auth plugin password


RC file載下來後輸入下列指令,並key上openstack的密碼(看你是下載哪個project):
stack@ubuntu:/home/openstack/Downloads$ source alt_demo-openrc.sh
Please enter your OpenStack Password for project alt_demo as user admin:

以下提供我的local.conf檔
# Sample ``local.conf`` for user-configurable variables in ``stack.sh``

# NOTE: Copy this file to the root DevStack directory for it to work properly.

# ``local.conf`` is a user-maintained settings file that is sourced from ``stackrc``.
# This gives it the ability to override any variables set in ``stackrc``.
# Also, most of the settings in ``stack.sh`` are written to only be set if no
# value has already been set; this lets ``local.conf`` effectively override the
# default values.

# This is a collection of some of the settings we have found to be useful
# in our DevStack development environments. Additional settings are described
# in https://docs.openstack.org/devstack/latest/configuration.html#local-conf
# These should be considered as samples and are unsupported DevStack code.

# The ``localrc`` section replaces the old ``localrc`` configuration file.
# Note that if ``localrc`` is present it will be used in favor of this section.
[[local|localrc]]


#Enable heat services
enable_service h-eng h-api h-api-cfn h-api-cw

#Enable heat plugin
enable_plugin heat https://git.openstack.org/openstack/heat stable/queens

#Use Heat Dashboard in DevStack
enable_plugin heat-dashboard https://git.openstack.org/openstack/heat-dashboard stable/queens

#IMAGE_URL_SITE="http://download.fedoraproject.org"
#IMAGE_URL_PATH="/pub/fedora/linux/releases/25/CloudImages/x86_64/images/"
#IMAGE_URL_FILE="Fedora-Cloud-Base-25-1.3.x86_64.qcow2"
#IMAGE_URLS+=","$IMAGE_URL_SITE$IMAGE_URL_PATH$IMAGE_URL_FILE

# Download and register a VM image that Heat can launch
IMAGE_URL_SITE="https://cloud-images.ubuntu.com"
IMAGE_URL_PATH="/xenial/current/"
IMAGE_URL_FILE="xenial-server-cloudimg-amd64-disk1.img"
IMAGE_URLS+=","$IMAGE_URL_SITE$IMAGE_URL_PATH$IMAGE_URL_FILE

# Minimal Contents
# ----------------

# While ``stack.sh`` is happy to run without ``localrc``, devlife is better when
# there are a few minimal variables set:

# If the ``*_PASSWORD`` variables are not set here you will be prompted to enter
# values for them by ``stack.sh``and they will be added to ``local.conf``.
ADMIN_PASSWORD=password
DATABASE_PASSWORD=$ADMIN_PASSWORD
RABBIT_PASSWORD=$ADMIN_PASSWORD
SERVICE_PASSWORD=$ADMIN_PASSWORD

# ``HOST_IP`` and ``HOST_IPV6`` should be set manually for best results if
# the NIC configuration of the host is unusual, i.e. ``eth1`` has the default
# route but ``eth0`` is the public interface.  They are auto-detected in
# ``stack.sh`` but often is indeterminate on later runs due to the IP moving
# from an Ethernet interface to a bridge on the host. Setting it here also
# makes it available for ``openrc`` to include when setting ``OS_AUTH_URL``.
# Neither is set by default.
#HOST_IP=w.x.y.z
#HOST_IPV6=2001:db8::7
HOST_IP=192.168.119.129

# Logging
# -------

# By default ``stack.sh`` output only goes to the terminal where it runs.  It can
# be configured to additionally log to a file by setting ``LOGFILE`` to the full
# path of the destination log file.  A timestamp will be appended to the given name.
LOGFILE=$DEST/logs/stack.sh.log

# Old log files are automatically removed after 7 days to keep things neat.  Change
# the number of days by setting ``LOGDAYS``.
LOGDAYS=2

# Nova logs will be colorized if ``SYSLOG`` is not set; turn this off by setting
# ``LOG_COLOR`` false.
#LOG_COLOR=False


# Using milestone-proposed branches
# ---------------------------------

# Uncomment these to grab the milestone-proposed branches from the
# repos:
#CINDER_BRANCH=milestone-proposed
#GLANCE_BRANCH=milestone-proposed
#HORIZON_BRANCH=milestone-proposed
#KEYSTONE_BRANCH=milestone-proposed
#KEYSTONECLIENT_BRANCH=milestone-proposed
#NOVA_BRANCH=milestone-proposed
#NOVACLIENT_BRANCH=milestone-proposed
#NEUTRON_BRANCH=milestone-proposed
#SWIFT_BRANCH=milestone-proposed

# Using git versions of clients
# -----------------------------
# By default clients are installed from pip.  See LIBS_FROM_GIT in
# stackrc for details on getting clients from specific branches or
# revisions.  e.g.
# LIBS_FROM_GIT="python-ironicclient"
# IRONICCLIENT_BRANCH=refs/changes/44/2.../1

# Swift
# -----

# Swift is now used as the back-end for the S3-like object store. Setting the
# hash value is required and you will be prompted for it if Swift is enabled
# so just set it to something already:
SWIFT_HASH=66a3d6b56c1f479c8b4e70ab5c2000f5

# For development purposes the default of 3 replicas is usually not required.
# Set this to 1 to save some resources:
SWIFT_REPLICAS=1

# The data for Swift is stored by default in (``$DEST/data/swift``),
# or (``$DATA_DIR/swift``) if ``DATA_DIR`` has been set, and can be
# moved by setting ``SWIFT_DATA_DIR``. The directory will be created
# if it does not exist.
SWIFT_DATA_DIR=$DEST/data


留言
張貼留言